

A new home router: eight steps to setting it up


After purchasing or resetting your router, you’ll need more than just a Wi-Fi username and password. This guide walks you through a series of steps, from logging in locally and updating the firmware to checking your devices and saving your configuration.
After purchasing or resetting the router, first connect to it locally, change the administrator password and update the firmware. Then set up your internet connection and secure network, check guest access and remote management, test your devices and save a backup of the configuration.
Guide. Steps 1–5 are required to set up the main network; step 6 restricts guest access; step 7 disables unnecessary external management; and step 8 locks the configuration in place. Menu names and available functions vary by model: please refer to the manual for your specific router.
Details
1. Find the manual and connect to the router locally
Before starting the setup, note down the exact model and hardware revision from the sticker, open the manufacturer’s manual and have the connection details provided by your internet service provider to hand. Connect your computer via an Ethernet cable, if possible, or to the temporary network specified in the instructions. Do not use a public network for your first login.
The admin panel address, app, initial login details and method of connecting to your provider will vary. There is no one-size-fits-all path through the menu: an incorrect connection profile could leave the network without internet access, even though the Wi-Fi itself will be visible.
2. Change the administrator password
Set a separate, long and unique password for managing the router. This is not the Wi-Fi password: the administrator account allows you to change the settings for the entire network. If the model allows you to change the default administrator name, do so as well.
CISA recommends changing the default username and password, as the factory settings for well-known models may be publicly available. Save the new password in a password manager; resetting the router will restore the factory settings.
3. Update the firmware
Check for updates via the control panel or the manufacturer’s official app, and install stable firmware for your specific model and revision. Do not switch off the power during installation. If automatic security updates are available, enable them after checking the feature description first.
The NCSC advises keeping device firmware up to date and using a trusted update mechanism. If the manufacturer has ceased releasing patches or the update fails, it is safer to check the model’s support status before proceeding with further configuration.
4. Configure your internet connection
Select the connection type and settings exactly as specified by your internet service provider: automatic IP address allocation, login credentials, VLAN settings or other values may not always be required. If your provider ties the service to specific hardware, follow their official procedure rather than random instructions intended for a different model.
Check that the router has obtained an external network address and can access websites. Do not disable the built-in firewall or other security features to troubleshoot the issue without a confirmed cause: first check the cable, port and your ISP’s settings.
5. Set the name, password and security for your main network
Choose a neutral network name that does not reveal your surname, address or router model, and a separate, unique password. WPA3-Personal is preferable, provided it is supported by the router and all the necessary devices. For a mixed network, you may need to use WPA2/WPA3 transition mode or WPA2-AES; do not use WEP, WPA or TKIP.
The Wi-Fi Alliance describes WPA3 as the current generation of Wi-Fi security, but compatibility depends on the certification of specific devices. Once you have saved the settings, reconnect your computer using the new name and password, then test the internet connection on each band you use.
6. Isolate guests and smart devices where necessary
Set up a guest network if visitors need internet access, and ensure that guest devices cannot see the router’s dashboard, computers or network storage devices on the main network. Set a separate password for it and change it after sharing it with a large number of people.
Some models simply use ‘guest network’ as an additional name without any isolation, whilst others do not allow a separate network for smart home devices. Check the feature description in the manual and verify that local resources are indeed inaccessible from a test guest device.
7. Disable unnecessary remote administration
Ensure that the control panel is only accessible from your home network unless you require management via the internet. The manufacturer’s cloud app and web access from an external IP address are different mechanisms; assess each one separately and secure the account you use with multi-factor authentication, if available.
CISA considers secure administration methods and automatic updates to be important features of home and office routers. Do not open the control panel to the outside world simply for convenience; for remote access that is genuinely necessary, use a secure method documented by the manufacturer.
8. Check the network and save the working configuration
Reboot the router, ensure that the main and guest networks come back online, that the internet is working, and that the control panel is inaccessible to guests and from the external network. Connect different types of devices one at a time and check whether you’ve had to compromise security for the sake of an older client.
Once you have checked everything, export a backup of the settings, if the model supports this, and store it separately from the router, noting the model, firmware version and date. The file may contain sensitive information and is usually only compatible with a specific model or version; protect it with a password and do not treat it as a substitute for the provider’s recorded settings.
Why this is important
This is a step-by-step guide: updates and administrative security measures must precede normal use, and it only makes sense to create a backup after a successful test. If you change the order arbitrarily, you may end up with a vulnerable or non-functional configuration and then restore it along with the errors.
The strictest security mode is not always compatible with older devices. Compromises should be made on a case-by-case basis: first, identify which clients do not support WPA3, then select a transitional mode or a separate segment, rather than disabling security for the entire network. A guest network is only useful if it is genuinely isolated, whilst a backup protects against having to reconfigure settings manually, but not against the leakage of the secrets it contains.
If your provider’s settings are unknown, the update is not intended for a specific version, the router is no longer receiving updates, or remote access is required for a critical task, stop and contact your provider or the manufacturer’s support team. Navigating the menu of a different model at random is more dangerous here than pausing.
Source
- CISA: protecting your home network.
- NCSC: managing device firmware.
- Wi-Fi Alliance: resources on WPA3.
- CISA: security requirements for home and small office routers.
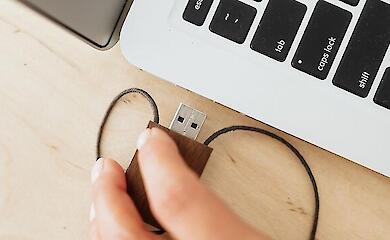
- Illustrative photo by Jakub Zerdzicki on Pexels, Pexels Licence.
Sources and subject-to-change recommendations were verified on 13 September 2026. The availability of WPA3, guest isolation, automatic updates, backups and remote management depends on the model and firmware version.
Mykola Potyka has a wide range of knowledge and skills in several fields. Mykola writes interestingly about things that interest him.
Related news
Scientists have discovered why the electricity grid fluctuates every 60 seconds


A drone gives itself away by leaving an ‘invisible trail’ — they have learnt how to detect it without radar
How to store family photos and videos so you don’t lose your archive
Popular news

Genetic evidence of natural selection has been found in dogs near the Chernobyl Nuclear Power Station


A fish with a transparent head was filmed in 4K at a depth of 600 metres


News about war

Russia is threatening to destroy bridges, ports and power stations in Ukraine in order to secure territorial concessions from Kyiv – FT

Emergency power cuts have been introduced in Kyiv and warming centres are being set up — Klitschko


Zelenskyy confirmed that the Russian warning system had been hacked: Ukraine has responded to the Russian Federation’s cyberattack

Stephen Hubbard has returned to the US after four years in prison in Russia: what is known about his case
